

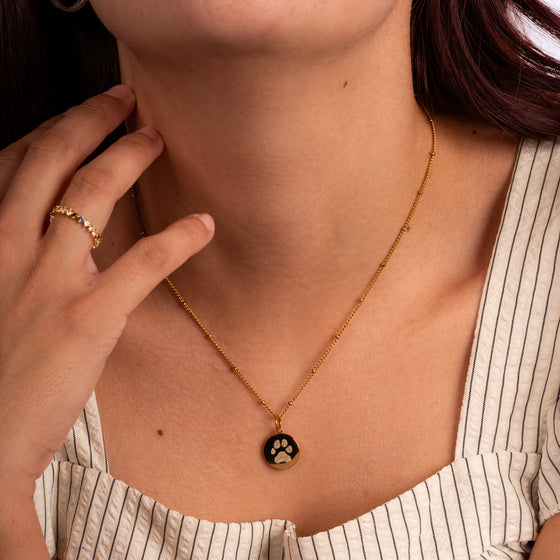

Making a paw print at home: 3 methods at a glance
You can make your dog's paw print at home with just a few simple supplies. Which method is right depends on what you'd like to do with it: a picture for the wall, a keepsake you can hold, or a template for paw print jewelry.
- Method 1: Ink pad or print kit. A flat, clear print on paper. The best template for engraving.
- Method 2: Salt dough or plaster. A three-dimensional keepsake to treasure. For jewelry, you'll need a good photo of it.
- Method 3: Household items like food coloring or flour. For anyone who doesn't have an ink pad on hand.
Whichever method you choose, the print doesn't have to be perfect. What matters is that the shape of the paw and the individual pads are easy to make out.
Getting ready: how to keep your dog relaxed
The best time is after a walk, when your dog is tired and calm. Have everything ready before you call your dog over, so you're not hunting for things in the middle of the print.
- Several sheets of light-colored, sturdy paper and a hard surface, such as a book or clipboard
- Damp wipes and a towel for the paw afterward
- Treats as a reward
- If possible, a second person to keep your dog calm and distracted
- Clean, dry paws: gently wipe off dirt and moisture beforehand
Sit next to your dog rather than directly in front of them. If they pull their paw away, take a break. Two or three tries are completely normal.
A paw print doesn't have to be perfect. It just has to be unmistakably your dog.
Method 1: Paw print with an ink pad or print kit
An ink pad gives you the clearest print. Choose a non-toxic, washable ink pad, like the ones sold for children's hand and footprints, ideally in a dark color.
- Dab the ink evenly onto the pads instead of pressing the paw firmly into the ink pad. That way the ink won't go on too thick.
- Place the paper on the hard surface.
- Set the paw down straight and press gently from above. Don't roll it, and don't slide it.
- Lift the paw straight up.
- Wipe the paw clean right away with a damp cloth and reward your dog.
- Make two or three prints in one go and let them dry. Then photograph the best one in daylight, directly from above, or scan it.
No ink pad at home? With our paw print jewelry, you can add a free print kit with instructions to your order and take the print at home, at your own pace.
For engraving: An ink pad print is the best template. It's flat, high in contrast, and the pads are clearly separated. Make sure the entire print is in the picture, and you can upload the file directly.
Method 2: Paw print in salt dough or plaster
A salt dough or plaster print is a keepsake you can hold in your hands. It lasts for many years and can be painted, labeled, or hung on the wall.
Salt dough paw print
For one round plaque, you'll need 2 cups flour, 1 cup salt, and about 1 cup water.
- Mix the flour and salt, add the water a little at a time, and knead into a smooth dough that isn't sticky.
- Roll the dough out to about 2 cm (3/4 inch) thick and cut out a circle using a plate or bowl.
- Place the paw in the center and press down evenly until the pads are clearly visible.
- Lift the paw straight out. If you'd like to hang the plaque, poke a hole with a straw now.
- Wash the paw thoroughly. Don't let your dog eat any of the dough; all that salt isn't good for dogs.
- Let the plaque air-dry for two to three days, or dry it in the oven at a low temperature, about 80 °C (175 °F), for several hours.
Plaster paw print
Don't press the paw directly into wet plaster. It heats up as it sets and can irritate the skin. It's better to take a small detour and use a mold:
- First make a print in salt dough or modeling clay, as described above.
- Place a strip of cardboard or the ring of a springform pan around the print.
- Mix the plaster according to the package instructions and pour it into the mold.
- Once it has set, carefully remove the plaster plaque. Now the print is raised, just like the paw itself.
For engraving: A three-dimensional print makes a lovely keepsake, but it's trickier as a template for jewelry, because its shape only shows through light and shadow. Photograph it directly from above with light coming from the side so the pads stand out clearly. To be on the safe side, make a print on paper as well.
Method 3: Paw print with household items, no ink pad needed
Even without an ink pad, you can get a beautiful print. Two household items work especially well:
With food coloring
- Put a few drops of dark food coloring on a flat plate and dilute it with a few drops of water.
- Lay a folded paper towel in it. It soaks up the color and becomes your ink pad.
- Briefly press the paw onto the paper towel, then gently onto the paper.
- Wash the paw thoroughly afterward. Food coloring is safe, but it can briefly tint light-colored fur.
With flour
- Wipe the paw with a damp cloth so it's slightly moist but not dripping.
- Set the paw on dark construction paper and press gently.
- Sprinkle flour over the spot and wait a moment.
- Gently tap off the excess flour. It sticks where the paw was damp, leaving you with a light-colored print.
- Photograph the print right away, since flour smudges easily.
Keep acrylic and oil paints, ink, and markers away from the paw, along with cocoa or chocolate, which are toxic to dogs.
For engraving: A food coloring print on white paper works just as well as an ink pad print, as long as the color wasn't too wet. For a flour print, you'll need a well-lit photo taken from above with clear contrast between the print and the paper.
No print: is a photo of the paw enough?
Often, yes. If your dog is restless or has sensitive paws, a good, high-resolution photo of the underside of the paw can be enough. Shoot up close, in good light, and in sharp focus so the pads are easy to see. Avoid blurry shots, harsh shadows, and dark backgrounds. For many people this is the easiest way, especially if there's already a suitable picture on their phone.
What about cats?
All three methods work for cats too. Their paws are smaller and the pads sit closer together, so use only a little color and gentle pressure. Cats pull their paws away faster than dogs, so a sleepy moment and a second person help. Salt dough is often trickier with cats; an ink pad, the print kit, or a photo usually works better.
Which template works best for engraving?
At Mizodia, the paw print is transferred to the pendant using diamond engraving. Here's what makes a good template:
- The entire print is in the picture, and nothing is cut off.
- The individual pads are clearly separate and not smudged.
- The photo is taken directly from above, in daylight and without shadows.
- The print stands out clearly from the background.
- File formats: PNG, JPEG, WEBP, or HEIC.
If you already have your template, upload it directly when you order. If not, you'll receive a link by email after your purchase and can send it in later. For a Paw Print Necklace, a charm, or a bracelet, what matters most is that your dog is recognizable. Personalized jewelry is made individually and usually takes 4–7 business days once we have your template.
Common paw print mistakes
- Too much color: The pads run together. Dab it on thinly instead.
- Too much pressure or rolling: The shape gets distorted. Set the paw down gently and lift it straight up.
- Rushing: A restless dog smudges the print. Wait for a calm moment.
- Not enough light: Even a good print looks blurry in a dark photo. Photograph it from above in daylight.
- Only one try: Make several prints and pick the clearest one. That's not always the darkest.
Bottom line: the best paw print is the one that captures your dog
For a keepsake you can hold, salt dough and plaster are lovely. For jewelry, a flat print on paper works best, made with an ink pad, the print kit, or food coloring. And if the print just won't work out, a sharp photo of the paw is often the more relaxed solution.
That's how a small detail of your dog becomes a memory you carry with you every day. You'll find matching pieces in our paw print jewelry collection.

Sometimes a small detail is all it takes to make a big memory something you can wear.


