

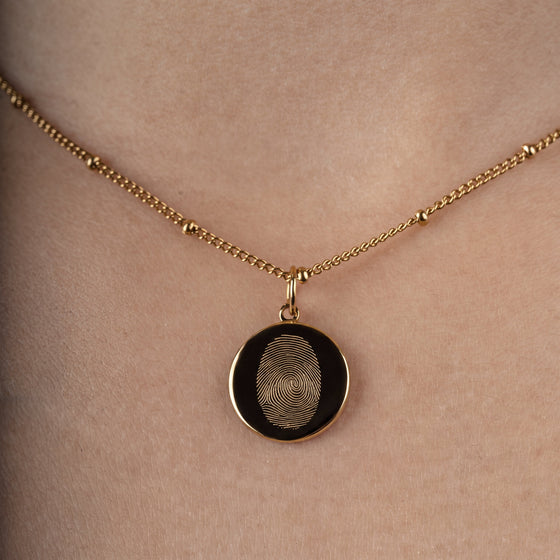

The short answer: you do not need an ink pad. A soft pencil with tape, lipstick or eyeliner on white paper, or a sharp phone photo taken directly of the finger all give you a template that can be engraved. What matters is not the material but that the lines are clearly separated and fully visible. Here you will learn step by step how the three methods work, which one suits which situation, and which mistakes make the engraving blurry. You will find the matching fingerprint necklaces at the end of the article.
What a good fingerprint for engraving needs
A good print for engraving shows the ridge lines as clear, separate strokes, without smudged areas and without cut-off edges. The pendant is 15 or 20 mm in diameter, and the fingerprint is transferred onto this small surface by diamond engraving. Small differences in the template become clearly visible: where the lines run into each other on paper, they also blur on the metal.
Three things make the difference:
- Little colour: Too much graphite, lipstick or ink fills the grooves between the lines and creates a dark smudge.
- A steady roll: Roll the finger once from left to right, do not move it back and forth.
- Contrast: Dark lines on a white background are the easiest to work with.
Method 1: pencil and tape
The pencil method is the most reliable option without an ink pad, because graphite only sticks to the raised lines. You need a soft pencil (ideally 4B to 8B), a sheet of paper and clear tape.
- Shade an area of about 3 × 3 cm on the paper with the pencil until it has an even, shiny dark grey.
- Rub your fingertip firmly over the area once, rolling it slightly from one side to the other so the edges pick up graphite too.
- Press a strip of tape, sticky side down, onto the fingertip and smooth it from the centre outwards.
- Slowly peel off the tape and stick it onto a white sheet of paper.
- Photograph or scan the print from above in daylight.
Tip: Make three to five prints in a row and then choose the sharpest one. It takes a minute and saves you a second attempt.
Method 2: lipstick or eyeliner on paper
Lipstick, eyeliner or eyeshadow work like an ink pad if you use them very sparingly. This method is useful when there is no soft pencil in the house.
- Apply a thin layer of lipstick or eyeliner to a piece of aluminium foil, a plate or the back of your hand.
- Dab the fingertip into it once or twice, then dab it almost dry on a paper towel. Only a trace of colour should remain.
- Place smooth white paper on a firm, flat surface.
- Put one side of the finger down and roll it evenly to the other side without pressing.
- Let the print dry briefly and photograph it from above.
Dark shades such as deep red, brown or black give the best contrast. Avoid glitter or pearly effects, because they reflect the light and swallow the lines in the photo.
Method 3: a photo taken directly of the finger
A photo taken directly of the fingertip works if your phone focuses at close range or in macro mode and the light comes from the side. This method is handy when the person cannot keep still or there is no paper at hand.
- Wash your hands and dry them well. Oily or damp skin shines and hides the lines.
- Stand by a window so that daylight falls on the fingertip at an angle from the side. Side light creates shadows in the grooves and makes the lines visible.
- Hold the fingertip in front of a dark, matte background and keep the finger still, ideally resting on the edge of a table.
- Shoot from a short distance without flash and without digital zoom. Tap the fingertip on the screen so the camera focuses there.
- Zoom into the photo on your phone. If you can clearly see the individual lines, it is usable.
The three methods compared
For most adults the pencil method is the best choice, the photo is the fastest and lipstick is the easiest with household items.
| Method | Materials | Level of detail | Suitable for |
|---|---|---|---|
| Pencil and tape | soft pencil, tape, paper | very high | adults, older children, anyone who can keep still for a moment |
| Lipstick or eyeliner | lipstick or eyeliner, paper, paper towel | medium to high, depending on the amount of colour | spontaneous prints when no pencil is at hand |
| Photo of the finger | smartphone, daylight | medium to high, depending on camera and light | restless children, quick templates when no paper is at hand |
Common mistakes and how to avoid them
Most unusable templates are caused by too much colour, too much pressure or poor light when photographing.
- A black smudge instead of lines: too much colour. Wipe the finger, colour it again and dab it on a towel first.
- Double outlines: the finger slipped. Next time roll it only once and lift it straight up.
- Only the centre is visible: the finger was pressed, not rolled. Place it on its side and roll it to the other side.
- Blurry photo: too little light or too close. Use daylight, keep a little distance and crop later.
- Shadow over the print: your phone or hand casts a shadow. Stand sideways to the window and shoot straight down from above.
Prints from children and several people
With children a photo usually works best; with several people it pays to take all prints with the same method. That way the lines on the pendant look equally strong and the piece looks calm.
For small children, choose a moment when they are relaxed, for example while you read to them. One finger is enough; many people choose the thumb because it has the largest surface. If you want to combine two prints on one pendant, for example from partners or siblings, the fingerprint necklace with two prints is the right choice. Instead of a finger you can also capture a hand or foot; you will find ideas in our hand and footprint jewellery.
What happens after you take the print
Once you have a sharp template, upload it with your order or send it later. Personalised jewellery reaches you in Germany within 4 to 7 working days.
If you are not sure whether your print is good enough: zoom in on the screen. If you can follow the individual lines right to the edge, the template is good. If not, it is better to try once more.
Conclusion: pencil for detail, photo for speed
A fingerprint without an ink pad works with things almost everyone has at home. The pencil and tape method gives the most detail, a photo in side daylight is the fastest. Lipstick or eyeliner work as long as you use them sparingly. Take several attempts, check the lines when zoomed in and choose the sharpest print. Then your template becomes a fingerprint necklace that looks exactly like the finger it came from. You will find all models in our fingerprint necklaces.


